Sunday, July 18, 2010

Wall Texture

My favorite type of wall texture is heavy knock-down. I learned how to do it myself from a friend in Tumwater, Damon Stevens. After Damon taught me how to do it I bought my own spray rig and have textured many rooms. At the time this was the best DIY spray rig on the market and it works great. It has three sizes of tips for different textures, rather than the old style with a rotating disc with different size holes. I have also blended orange peel textures and acoustic ceiling texture with it with good results.


I use thinned joint compound and dial the pressure back to about 40 psi. I noticed early on that if I did not do a good job feathering out the joints that they would show in certain light. I naturally concluded that I needed to start with a smooth wall in order to achieve good results. After skim coating the walls of three rooms in this house I decided to try it without skim coating. The walls in this house have some kind of roller applied texture that is not very attractive and un-duplicatable as far as I am concerned. Skim coating is a LOT of work, messy and requires a lot of sanding. See my previous posts.

For the master bedroom and the office I sprayed the texture over the existing texture with no prep to speak of. I did take a 6" knife and hit some of the really high spots to knock them down a bit. the results were amazingly good. To me they don't look any different than the rooms I spent days skim coating.  Needless to say, I won't be doing any more skim coating.


This is an unpainted wall.


After painting. You can't tell that the knock down was sprayed over another texture.

Sunday, May 23, 2010

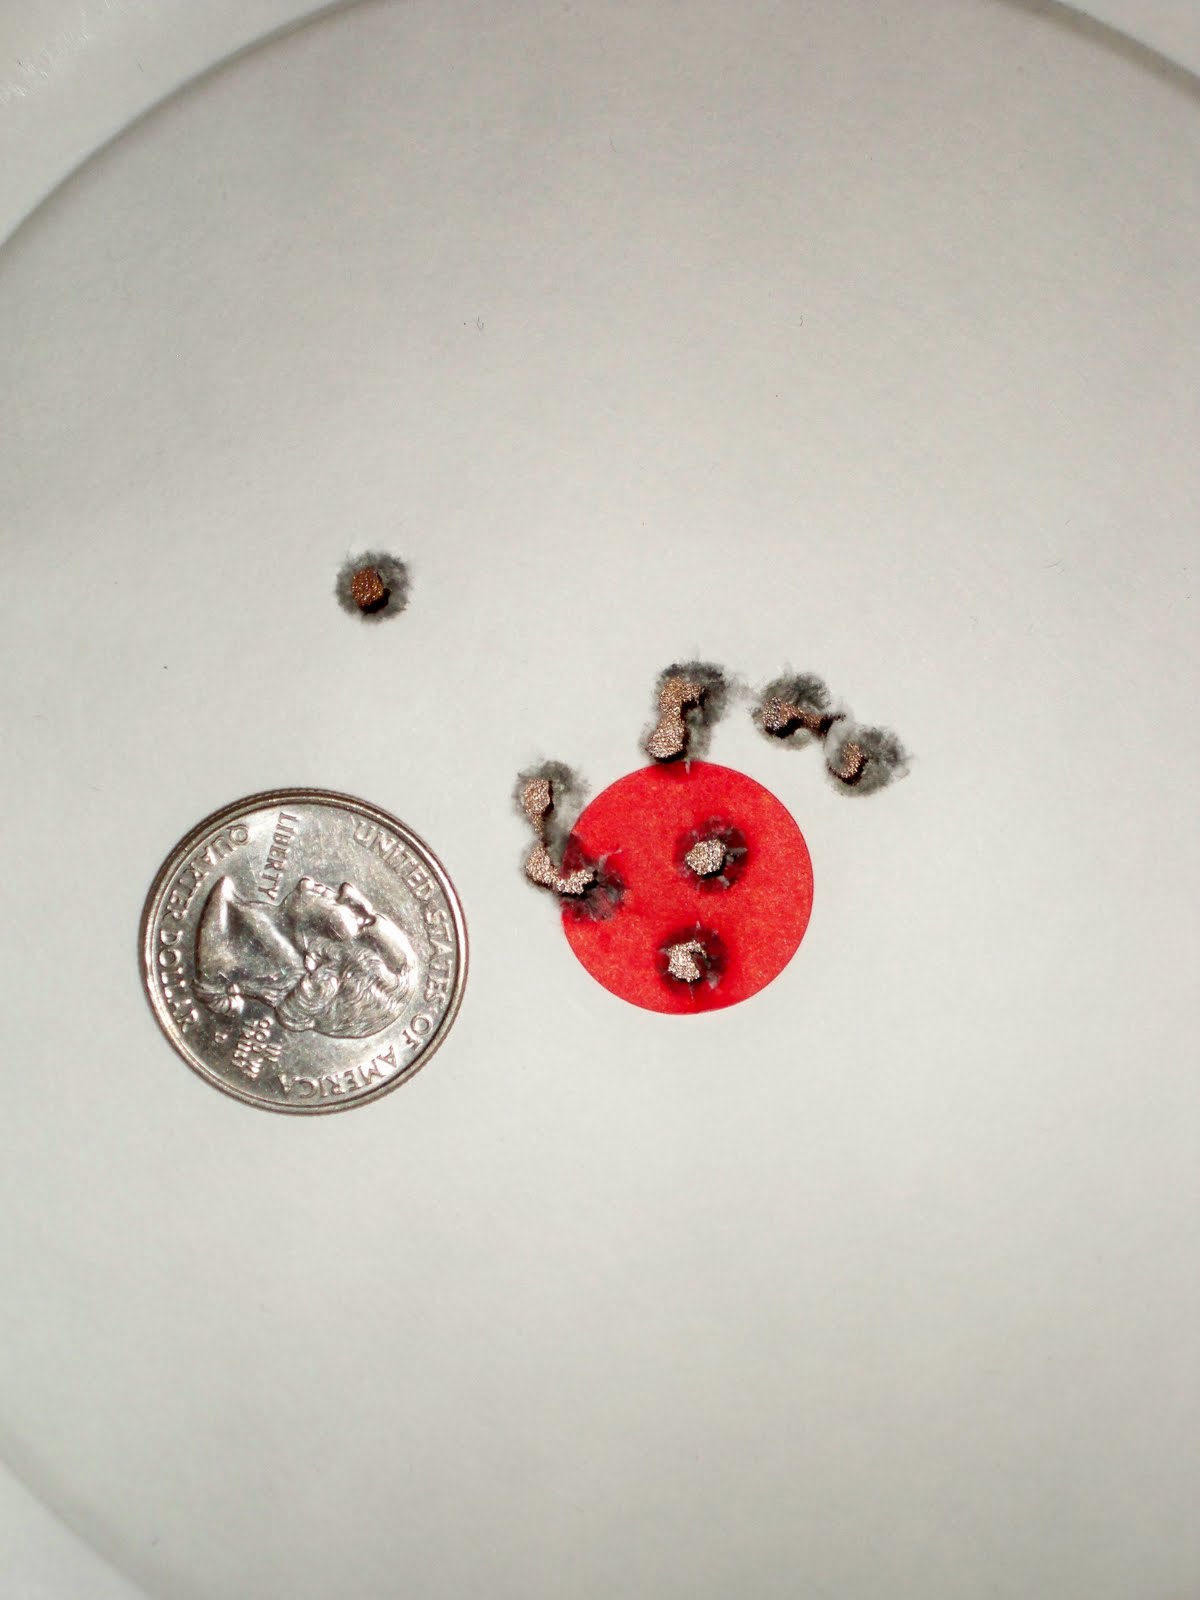
Some Pretty Fine Shootin

I took Ben out shooting while he was here in Houston. Turns out he is a pretty good shot with a handgun. I don't get out to the range all that often but after a little practice I got so I could make a pretty good grouping with the Browning 22 Buckmark. This is my best target.

Friday, April 23, 2010

275 foot fence

I am posting some photographs of the fence I just finished building. The wood fences blew down in hurricane Ike, almost a year and a half ago. I finally had some time at home when the weather was good and the soil was still soft. This was 275 linear feet of 6 ft cedar fence; 37 posts, 646 cedar fence boards, 56 80 lb bags of concrete. It was a challenging project. I have not built a fence since we bought our first house in Salem. It was a very small yard and the ground was level. Here the ground is not level, the old fence was not straight and many of the old posts and concrete were still in the ground along with a large tree stump I had to work around. The soil here is clay. They refer to it as Texas "gumbo" when it gets wet it sticks to everything like glue. When it is dry it is as hard as concrete. The trick is to build when the soil is wet enough to dig but not too wet so that it won't stick to the tools. It was still pretty wet. I rented a one man post hole auger which proved to be a real workout. I dug about a third of the holes by hand and finished the last 22 with the auger. The layout was a real challenge. I tried to use a 50 ft string and follow the old posts but that proved to be a crooked course. I picked out a post mid way and built to that and then straight from there to the back post. There is a noticeable crook in the fence line. I have decided that either the front end is a foot or two on my side of the property line or the middle was off. I think it is the front. If the fence blows down again while I live here I'll have it surveyed before I rebuild it.

Saturday, January 23, 2010

Faux Beams


When I did the drywall in the living room and dining room I did not finish the door jamb between the two rooms. I wanted to use some of the same reclaimed timber that I used for the mantle to create a beamed look for the doorway. Well that kind of went by the wayside for a while and I thought I would try to buy or make some french doors that would look old and worn. The problem is the size of the opening. it is 8 ft tall.  Finding ready made doors that fit the opening was proving to be a problem as was making them. I was really wishing that I had just wrapped the whole thing with sheet rock and had it textured to match when I had the walls done originally. I could do it now but matching the texture exactly is always a problem and I did not want a miss-match patch job. I went back to the rustic beam idea and decided to expirament with some cheap 1X lumber. I studied some distressed furniture and looked up some ideas on the internet. Here is the end result. I am pretty happy with the way it all turned out. I learned some lessons that I would do differently, but nothing that makes me want to scrap the attempt and start over. So far the reaction from everyone that has seen it has been very positive. Please feel free to add any comments positive or not.

Dining Room Progress


The dining room is comming along quite well. I have finished all the painting. I was not going to paint the ceiling but after the walls and trim were painted the ceiling looked pretty dingy so I decided to go ahead and do it. I already had a bucket of left over paint. All that remains to do is install and paint the base board and trim around the doors. I used the same red paint that was left over from when Robin painted the walls originally. The frieze and crown molding was looking pretty bad. there were some cracks showing up between the crown and the ceiling. Some caulk and a coat of glossy white paint has really made a big difference in the look.
 

Saturday, January 2, 2010

Wall Texture


This is just an update on the dining room progress, which I am really happy about. It took two days for the skim coat to dry in the corner on the outside wall without any insulation in the bay. I debated about cutting the drywall out and adding some insulation but decided not to. It goes against my nature so I still have twinges of regret when I think about it. I find it very hard to leave a mistake uncorrected.

Thursday afternoon I sanded the walls and yesterday I sprayed the texture. I have to say this is the fastest I have ever completed such a task. It took me many days between trips to complete the bedroom. once the skim coat is on it must be sanded. Sanding drywall joints and patches is a laborious and messy job. The dust is extreemly fine and seems to find it's way into every place in the house from one end to the other. I decided to try mechanical sanding this time. I hooked the shop vac to the dust port on my random orbital sander and with 80 grit paper sanded all three walls in about an hour or so. The really cool thing is that there was no dust! The vac did a superb job. I can't believe it has taken me this long to figure this out!

There are a couple of good reasons actually. One is that the vacume adapter for my sander really didn't fit well(thanks to Porter Cable)It just occurred to me that wrapping a single layer of duct tape(the handy-man's secret weapon) around the port on the sander would hold the adapter in place. It did! I tried electrical tape in the past and the results were not acceptable.

The second and biggest reason is my recent discovery of bags for the shop vac! I don't know how long they have been around, but they turn a good tool into a fantastic system. Why didn't someone tell me about these things years ago. The dust filter on a shop vac clogs with dust pretty quickly(duh)when you vaccum up any kind of fine particles. Dry wall dust is especially bad clogs the filter very quickly. Once the filter is clogged the suction is reduced substantially. The bags are fantastic. All the dust is contained in the bag and the filter stays clean. I'm telling you this is really fantastic.

Wednesday, December 30, 2009

Floor Plans


When ever I read a magazine article about a remodel I like to see the before and after floor plan. So, I thought I'd post the before and after plans in case anyone else who might read this is like me. The plan above is as it was when we bought the house. There was a double door closing the entry off from the living room. The dining room was completely open to this wierd entry and there was a pass through from the dining room flanked by collumns on the angled wall. I removed the columnns and closed the wall between the entry. I also removed the wall with the strange double doors opening the entry to the living room rather than the dining room.


The other major change to the plan was to close off the hallway. This added a measure of privacy to the rooms that open off the hall so that you can't sit in the living room and look directly into the bathroom and bedroom. I also deleted the hideous wet bar. Yuck! The hall now separated from the living room has a lower ceiling which created the really cool alcove above the hall where I have installed cove lighting and gives us a place to display our little Christmas trees.


The interesting thing about the demolition was the discovery of the original floor plan(above) which was very different than either of the configurations shown here. After removing the tile the original chalk snap lines could be seen. In the original plan the hallway was not open to the living room. The current closet was a short hall that connected to the main hallway with a coat closet on one side. I think I like the way it is now better.

One of my current favorite programs on HGTV is a show called "Holmes on Homes". It is a Canadian program as many of the best ones are. Holmes is a contractor that fixes renovations and new construction that was done incorrectly or that have gone bad. It is very interesting to see some of the disasters created by licensed contractors and builders that have to be completely torn out and re-done. Renovating this house I can really relate to that.